
How to Weigh Backpacking Gear: A Repeatable Method for an Accurate Pack List
Accurate pack weight starts with a simple rule: weigh the exact version of every item that will leave the trailhead, then verify the itemized total against the fully packed backpack. A kitchen scale handles most gear; a luggage or bathroom scale closes the gap for the finished pack.
The Direct Answer: Use Two Measurements
First, weigh each item individually and record its category, quantity, and whether it is packed, worn, or consumable. Second, pack exactly as you will for the trip and weigh the complete backpack. The two totals should be close. A meaningful difference usually points to an omitted item, a quantity error, packaging, or an old saved weight.
This method gives you both views you need. The itemized list explains where the weight comes from; the packed measurement confirms what you will actually carry.
Choose the Right Scale for Each Job
| Scale | Best use | Method |
|---|---|---|
| Digital kitchen scale | Small and medium items, including clothing, electronics, cookware, and most individual gear | Tare a tray or bowl, then weigh one complete item at a time. |
| Hanging luggage scale | A loaded backpack, bulky shelter, or item that does not sit securely on a kitchen scale | Attach a stable strap, lift clear of the floor, and repeat the reading. |
| Bathroom scale | A final packed-weight check when a luggage scale is unavailable | Subtract your weight without the pack from your weight while wearing it. |
Put every scale on a stable surface and check that it reads zero before each measurement. If a reading changes when repeated, reposition the item and use a container or strap that keeps the load centered. Record the resolution your scale can support; extra decimal places do not make an unstable measurement more accurate.
Weigh the Configuration You Carry
- 1. Pick one unit. Grams make small differences easy to compare. Ounces also work. Convert only for display after the measurement, rather than switching units item by item.
- 2. Tare the container. Put an empty bowl, tray, or sling on the scale and reset it to zero. The container keeps awkward gear stable without becoming part of the recorded weight.
- 3. Include carried parts. Add the batteries in the headlamp, the stakes and guylines used with the shelter, the filter cap, and the cable that makes an electronic useful. Remove packaging or accessories that stay at home.
- 4. Name the item clearly. Include the model or distinguishing detail. “Blue jacket” becomes ambiguous as soon as another blue layer enters the gear closet.
- 5. Repeat uncertain readings. Reweigh anything near the scale limit or balanced awkwardly. If the values disagree, use a better-supported setup instead of averaging a bad measurement.
Record Quantities, Worn Items, and Consumables Correctly
| Situation | Recording rule |
|---|---|
| Item with removable parts | Weigh the configuration you carry, including batteries, stakes, stuff sacks, and required cables. |
| Several identical items | Record one unit and its quantity, or weigh the group and state that the value is the group total. Do not mix the two methods. |
| Tiny item below the scale threshold | Weigh several together, divide by the count, and keep the same unit throughout the calculation. |
| Food, fuel, or water | Record the amount carried at the trailhead and mark it consumable instead of folding it into base weight. |
| Clothing or equipment worn while hiking | Record the actual item and mark it worn; packed spare clothing remains in base weight. |
The categories matter because they answer different questions. Base weight describes carried equipment before food, water, and fuel. Trailhead pack weight adds consumables. Worn weight remains part of the complete system even though it is not inside the backpack. The guide to base weight explains these boundaries in detail.
Reconcile the List With the Packed Backpack
Add the itemized packed gear and consumables, then compare that number with the scale reading for the loaded backpack. Do not expect perfect agreement across two different scales, but investigate a difference large enough to change a packing decision.
A worked reconciliation
Suppose the itemized list totals 7,820 g and the loaded pack reads 8,060 g. The 240 g gap is not a reason to change tents. Empty the pack pocket by pocket first. A full fuel canister saved with its net fuel weight, a phone case omitted from the electronics entry, and a pack liner not listed at all can explain the difference. Correct the records, repack, and check once more.
Reconcile again after replacing gear, changing a consumable amount, or copying an old list for a new season. That prevents accurate numbers from slowly becoming an inaccurate pack.
Turn Measurements Into Decisions in MetaGear
MetaGear lets you save each measured item in Gear Locker, reuse it in multiple pack lists, set quantities, and mark items as worn or consumable. The list then calculates base weight, pack weight, and total trailhead weight while category visualizations reveal where the load is concentrated.
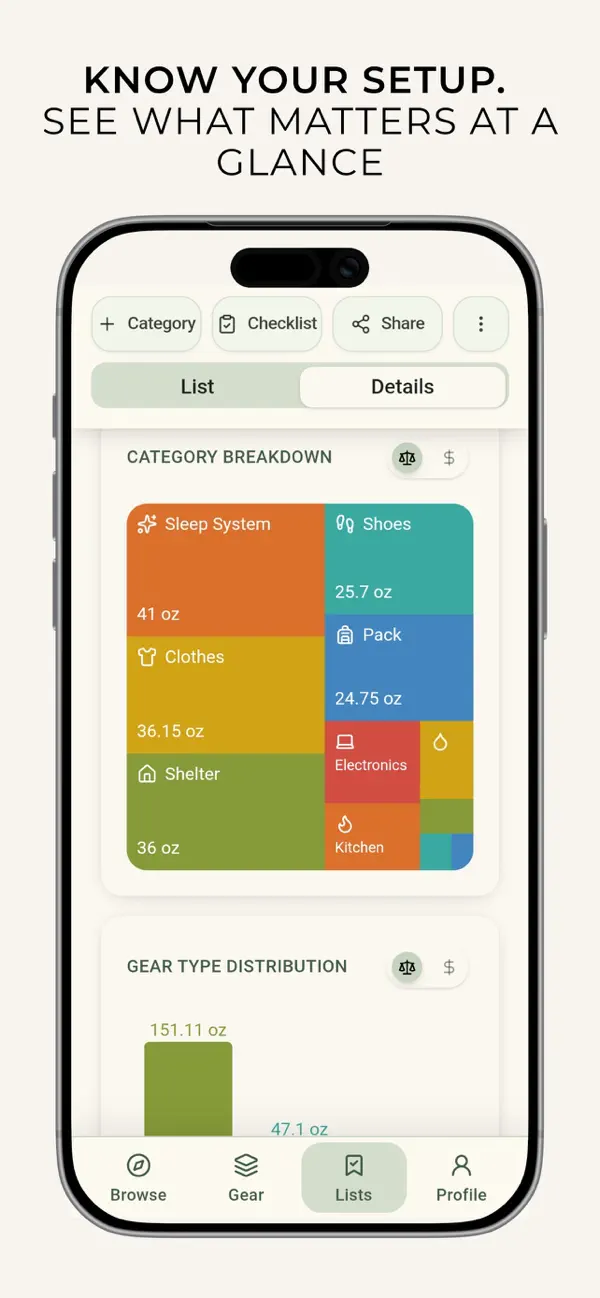
Once the numbers are trustworthy, use the gear shakedown workflow to question duplicated or low-value items, or compare the cost and weight of upgrades with the backpacking gear budget method.