
How to Build a Backpacking Gear Budget Without Buying Your Pack Twice
A backpacking budget should begin with a working trip plan and the gear already in your house—not a blank shopping list. Inventory what you own, identify true gaps, reserve money for the whole system, and compare upgrades by the problem they solve. That is how you avoid replacing an early purchase a month later.
Step 1: Write the Trip Brief Before the Budget
Budget for a real first use: expected temperatures and weather, trip length, terrain, whether you hike alone or share equipment, and how often you expect to go. A weekend in established summer campsites and a shoulder-season solo route do not create the same requirements.
Do not assign dollars yet. First, build a complete backpacking checklist for that trip. Mark shared equipment, items you can borrow or rent, and anything already owned. The remaining gaps—not every product in a buyer's guide—define the first version of the budget.
Step 2: Sort Every Item by Decision Status
| Status | What it means | Budget action |
|---|---|---|
| Required gap | The trip cannot reasonably proceed without this function. | Fund first; compare fit and trip requirements. |
| Works now | Owned gear meets the trip brief, even if it is not ideal. | Keep and test; spend nothing yet. |
| High-value upgrade | A change solves a repeated problem or makes a meaningful cut. | Rank by impact per dollar and frequency of use. |
| Preference upgrade | The benefit is real but the current item still performs its job. | Defer until the core kit is proven. |
This classification protects usable gear from the shopping process. A heavy but reliable sleeping bag may be a future upgrade; it is not a required gap. Money kept out of that purchase can fund footwear that fits, a missing shelter, or a trip-specific safety requirement.
Step 3: Budget by System, Including the Small Parts
Give each system a ceiling: shelter, sleep, pack, kitchen and water, clothing, navigation and electronics, safety and repair, and consumables. Record required accessories in the same row as the main item. A shelter may need stakes or a footprint; a stove needs a fuel setup; a water filter may need a compatible bottle. The checkout price of the headline product is not always the working-system price.
Keep a contingency line rather than allocating every dollar. That buffer handles fit exchanges, a missing adapter, shipping, or the small item discovered during a practice overnight. Record actual purchase prices separately from planned prices so the remaining budget stays honest.
Step 4: Rank Weight Upgrades by Cost and Use
For optional weight-saving upgrades, calculate the additional cost per ounce saved:
(new item cost − resale value of old item) ÷ ounces saved
Use the result as a comparison tool, not a command. A hypothetical $220 shelter that replaces a sellable $80 shelter and saves 20 ounces costs $7 per ounce saved. A $90 accessory that saves 3 ounces costs $30 per ounce. If both satisfy the trip brief, the shelter has the stronger weight return. But fit, weather performance, durability, and frequency of use can still matter more than the ratio.
Run free changes first. Removing duplicates, right-sizing containers, and leaving unused preference items at home often reveals the real category that deserves money. Our guide to lowering base weight walks through that order of operations.
Step 5: Compare the Whole Pack Before Buying
Clone your current list and replace only the candidate item. Compare the two versions for total cost, base weight, and the category that changed. This catches false economies—for example, a lighter shelter that needs a separate pole, or a smaller pack that works only after several other expensive replacements.
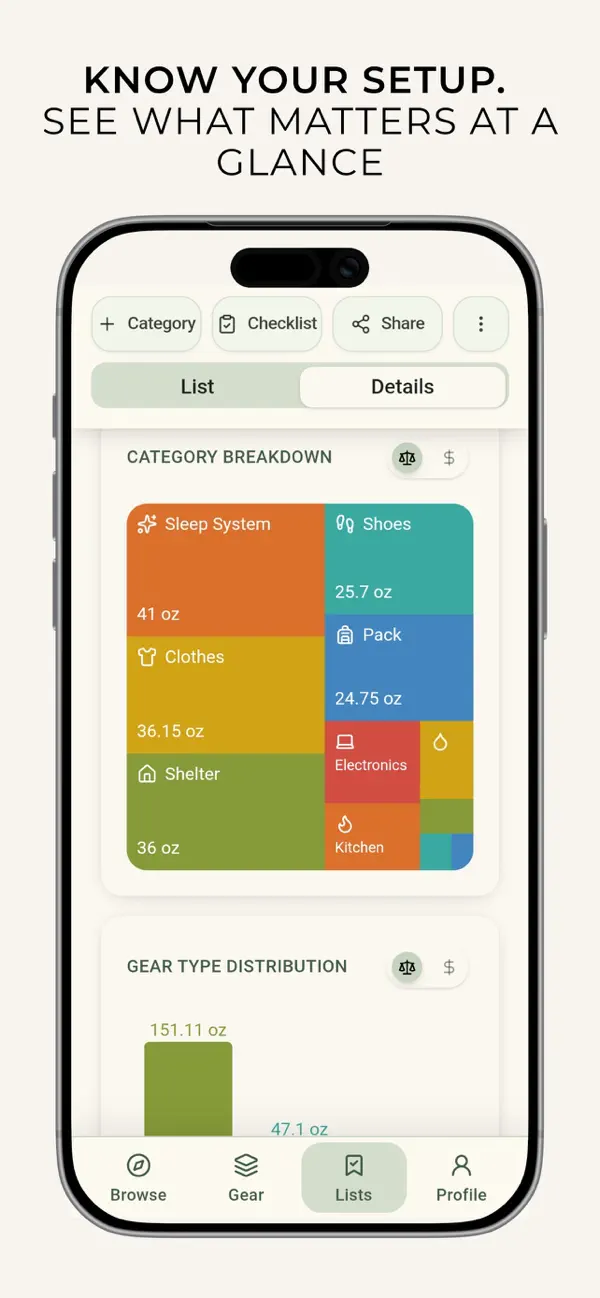
MetaGear keeps weights, prices, links, photos, and notes in the Gear Locker, then calculates pack-weight and cost analytics for lists. Smart Search can complete known gear details, while Compare Hub helps evaluate candidates side by side. If you already have a spreadsheet or another tool, use it; the essential practice is keeping owned gear, candidate gear, planned cost, and actual cost visibly separate.
The Purchase Gate
Before buying, require five yeses: the item fits the written trip, it solves a real gap or repeated problem, it works with the rest of the system, the full cost fits the remaining budget, and the return or trial conditions give you a reasonable way to verify fit. Then test it on a short outing before relying on it for a bigger trip.
Use the same criteria for each shortlist with the outdoor gear comparison matrix. The goal is not the cheapest pack or the lightest pack at any cost. It is a complete, tested setup you understand—and do not need to buy again because the first purchases ignored the whole system.